Beta Address: http://blish.org/sdrdxdoc/notches.html
5.11.8 - Notch Filters

Notch Filters
There are ten variable width, variable frequency notch filters. You can operate them in audio mode, or RF mode.
5.11.8.1 - Audio Mode
In audio mode ( ), they remove audio frequencies after demodulation. This is useful if you need to remove frequencies from the demodulated audio. They are very easy to use in audio mode.
5.11.8.2 - RF Mode
In RF mode ( ), they remove RF frequencies and are a bit trickier to use, but the benefits can be significant as compared to audio mode.
In AM or SAM demodulation mode, the interfering carrier may be on either side of the desired signal's carrier, but will result in the same audio frequency interference, so you can't just set an RF notch to the equivalent frequency in the audio spectrum.
In order to account for this, in AM, NFM and SAM mode, the upper row of notches notch only above the demodulation frequency, and the lower row of notches notch only below the demodulation frequency. Because five operate below the carrier, and five above, you only have five notches you can apply to either side of the carrier -- ten in total, but limited as to which side of the carrier they will operate on. Hopefully you'll find that easy to remember.
In other modes, RF notches know which side of the demodulation frequency the desired signal is actually on, and so they work more like the audio notches do, meaning you have ten available to you that function all the same.
5.11.8.3 - RF Notch Frequency Lock
leaves the RF notches where you put them when you change the demodulator frequency. This allows notching out RF birdies and carriers while tuning around. For instance, if you are tracking a satellite transmission, the doppler shift will cause the signal to change frequency. If you set up the RF notches to remove the birdies, then turn on , turn off , then you can precisely track the dopplered transmission with a varying demodulator frequency and the RF notches will stay locked to the birdies.

Interfering Heterodyne
When a notch is selected ( ), F (notch frequency) and Q
 (notch depth) will adjust only that notch. If the notch is on, but not selected, it will look like . To turn the notch off, click or again and then it is off (and selected), .
5.11.8.4 - Keyboard Controls
You can turn all the notches off at once by pressing ⇑ Y or →Left-click; you can temporarily turn them off using Y or →Left-click .
Next and Previous Notch are selected with h and g; ⇑ T turns the currently selected notch on and off; e and e adjust the notch by +/- 10 Hz; ⇑ E and ⇑ R adjust the notch by 100 Hz; and ^ E and ^ R adjust the notch by 1 Hz.
You can cause the notch filters to automatically turn off when you change frequency; set to on to activate this feature.
5.11.8.5 - Using the AF Scope to Set Notches

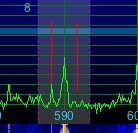
RF Het

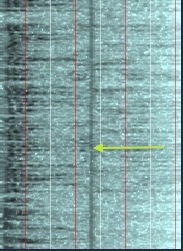
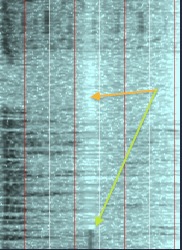
Waterfall just after clicking on interfering tone
My favorite way to adjust the notches is by using the setting of the aux scope to "see" the interfering tone, then left-clicking on the tone, which sets a notch exactly to that frequency. Right-clicking here selects the next notch, and you can go directly after the next tone, if there is one.
You can also use the linear spectrum and vector spectrum to do this. Note that with the vector spectrum, the setting is still set by dragging horizontally, not around the displayed circle.
As the bandwidth of the demodulator is set progressively wider, the precision of the notch frequency is correspondingly limited because there are increasingly fewer pixel positions horizontally for the mouse pointer than there are potential notch tunings.
You can use the scope to set the notch close to the target, then e and R, ^ e and ^ R, ⇑ E and ⇑ R to fine-tune the setting; or you can point at F and use the mouse roller to fine-tune. I prefer the keystrokes, because I have an Apple "magic mouse" and their emulation of the roller under OS X 10.6.8 is pretty broken.

Notched!
| toc | index | guide | changes | keyboard | , previous | . next |
 Nx
Nx